Challah

This week’s Sundays are for baking recipe is CHALLAH.
My mom is my guide in all things baking; she’s been baking since she was a pre-teen, and she makes amazing challah! Last month I asked her to show me how to make it.
The keys to great challah are kneading properly and braiding the loaf mindfully. Challah is an enriched bread. It gets its delicious, full flavor and smooth, fluffy texture from additional honey and eggs. I love to eat it on its own or with a bit of butter, and obviously it makes for amazing French toast.
Ingredients: (these amounts will produce two medium-large loaves, or one very large loaf)
1 packet (~2 1/4 teaspoons) yeast —> we used instant yeast; active dry yeast works as well
1 tablespoon sugar
1/4 cup warm water
1 large egg + egg for egg wash
3 large egg yolks
1/3 cup good honey
2 tablespoons oil + more for greasing —> use the lightest oil you have - ex, vegetable or canola oil; do not use olive oil or butter
1 1/4 cups warm water
2 teaspoons salt
4-6 cups flour —> we wound up using ~5 1/2 cups total; if you use too much flour, the bread will be too heavy
Subscribe now for issues of Sundays are for baking in your inbox! And read on for how to make challah!
To make the dough:
1. Combine yeast with sugar and 1/4 cup of warm water in a large bowl. Let sit for 10 minutes.
2. Create a steamy oven: boil a pot of water, remove from heat, and put pot in closed oven (turned off).
3. Mix liquid ingredients in a separate bowl—1 egg, 3 egg yolks, honey, 2 tablespoons of oil, and 1 1/4 cups of warm water—along with salt. Whisk, then add to the yeast mixture.
4. Add flour: start with 4 cups, then keep adding as necessary in batches. Knead the dough (punch it down and fold it over) together in the bowl until it feels nice and smooth. It should feel substantive but not heavy or sticky, and it shouldn’t separate quickly; when you fold it over on itself, it should merge with itself. Add flour if the dough is too sticky. Go slowly, and be sure not to add too much flour; dough that is under-dry, rather than over-dry, will produce bread with a better feel.—> You should wind up kneading for about 10 minutes total. If you under-knead, your bread will not be fluffy enough; if you over-knead, the dough will develop too much gluten and be overly firm.
Note: If you want to add anything to your challah—like chocolate chips, dried fruit, etc.—add mix-ins three-quarters of the way through kneading.
5. Take dough out of the bowl and transfer to a clean surface. Wash the bowl in order to re-use it and with a pastry brush and/or your fingers, grease the bowl with the same light oil you used to make the dough.
6. Put dough back in the bowl for proving; flip it over in the bowl so there is oil on the entire surface of the dough. While it’s proving, the dough should touch the sides of the bowl.
7. Pour out any extra oil from the bowl, and cover the bowl with a smooth towel dampened with warm water (squeeze any excess water from the towel first). Make sure the towel is not hanging too low in the bowl, touching the dough. Put bowl into the oven to prove for the first time.
—> First rise = 1 hour (dough should double in size; let it rise in the oven—turned off)
8. After first rise, take the dough out and return it to clean surface. Punch the dough once to knock some air out. Continue kneading (folding dough in on itself) for a few minutes—up to but less than 10.
9. Re-dampen the towel with warm water, return the dough to the bowl, and cover again to prove a second time. Meanwhile, re-boil pot of water, remove from heat, and put pot in oven when ready, while the dough is proving.
—> Second rise = 1 hour (dough should double in size; let it rise in the oven—still turned off)
To shape the loaves:
1. On a floured surface, turn out the dough. Split it in half using a clean bench scraper or knife.
2. Make 4 long strands from each of the dough halves; they should be chubbier in the middle and more tapered at the ends. To do this, split each dough half into 4 sections and shape each with your hands, rolling and stretching the dough into rope-like strands. Try to stretch the length of the strands to 12 inches and keep them even (if you have shorter strands, you’ll have a shorter loaf).
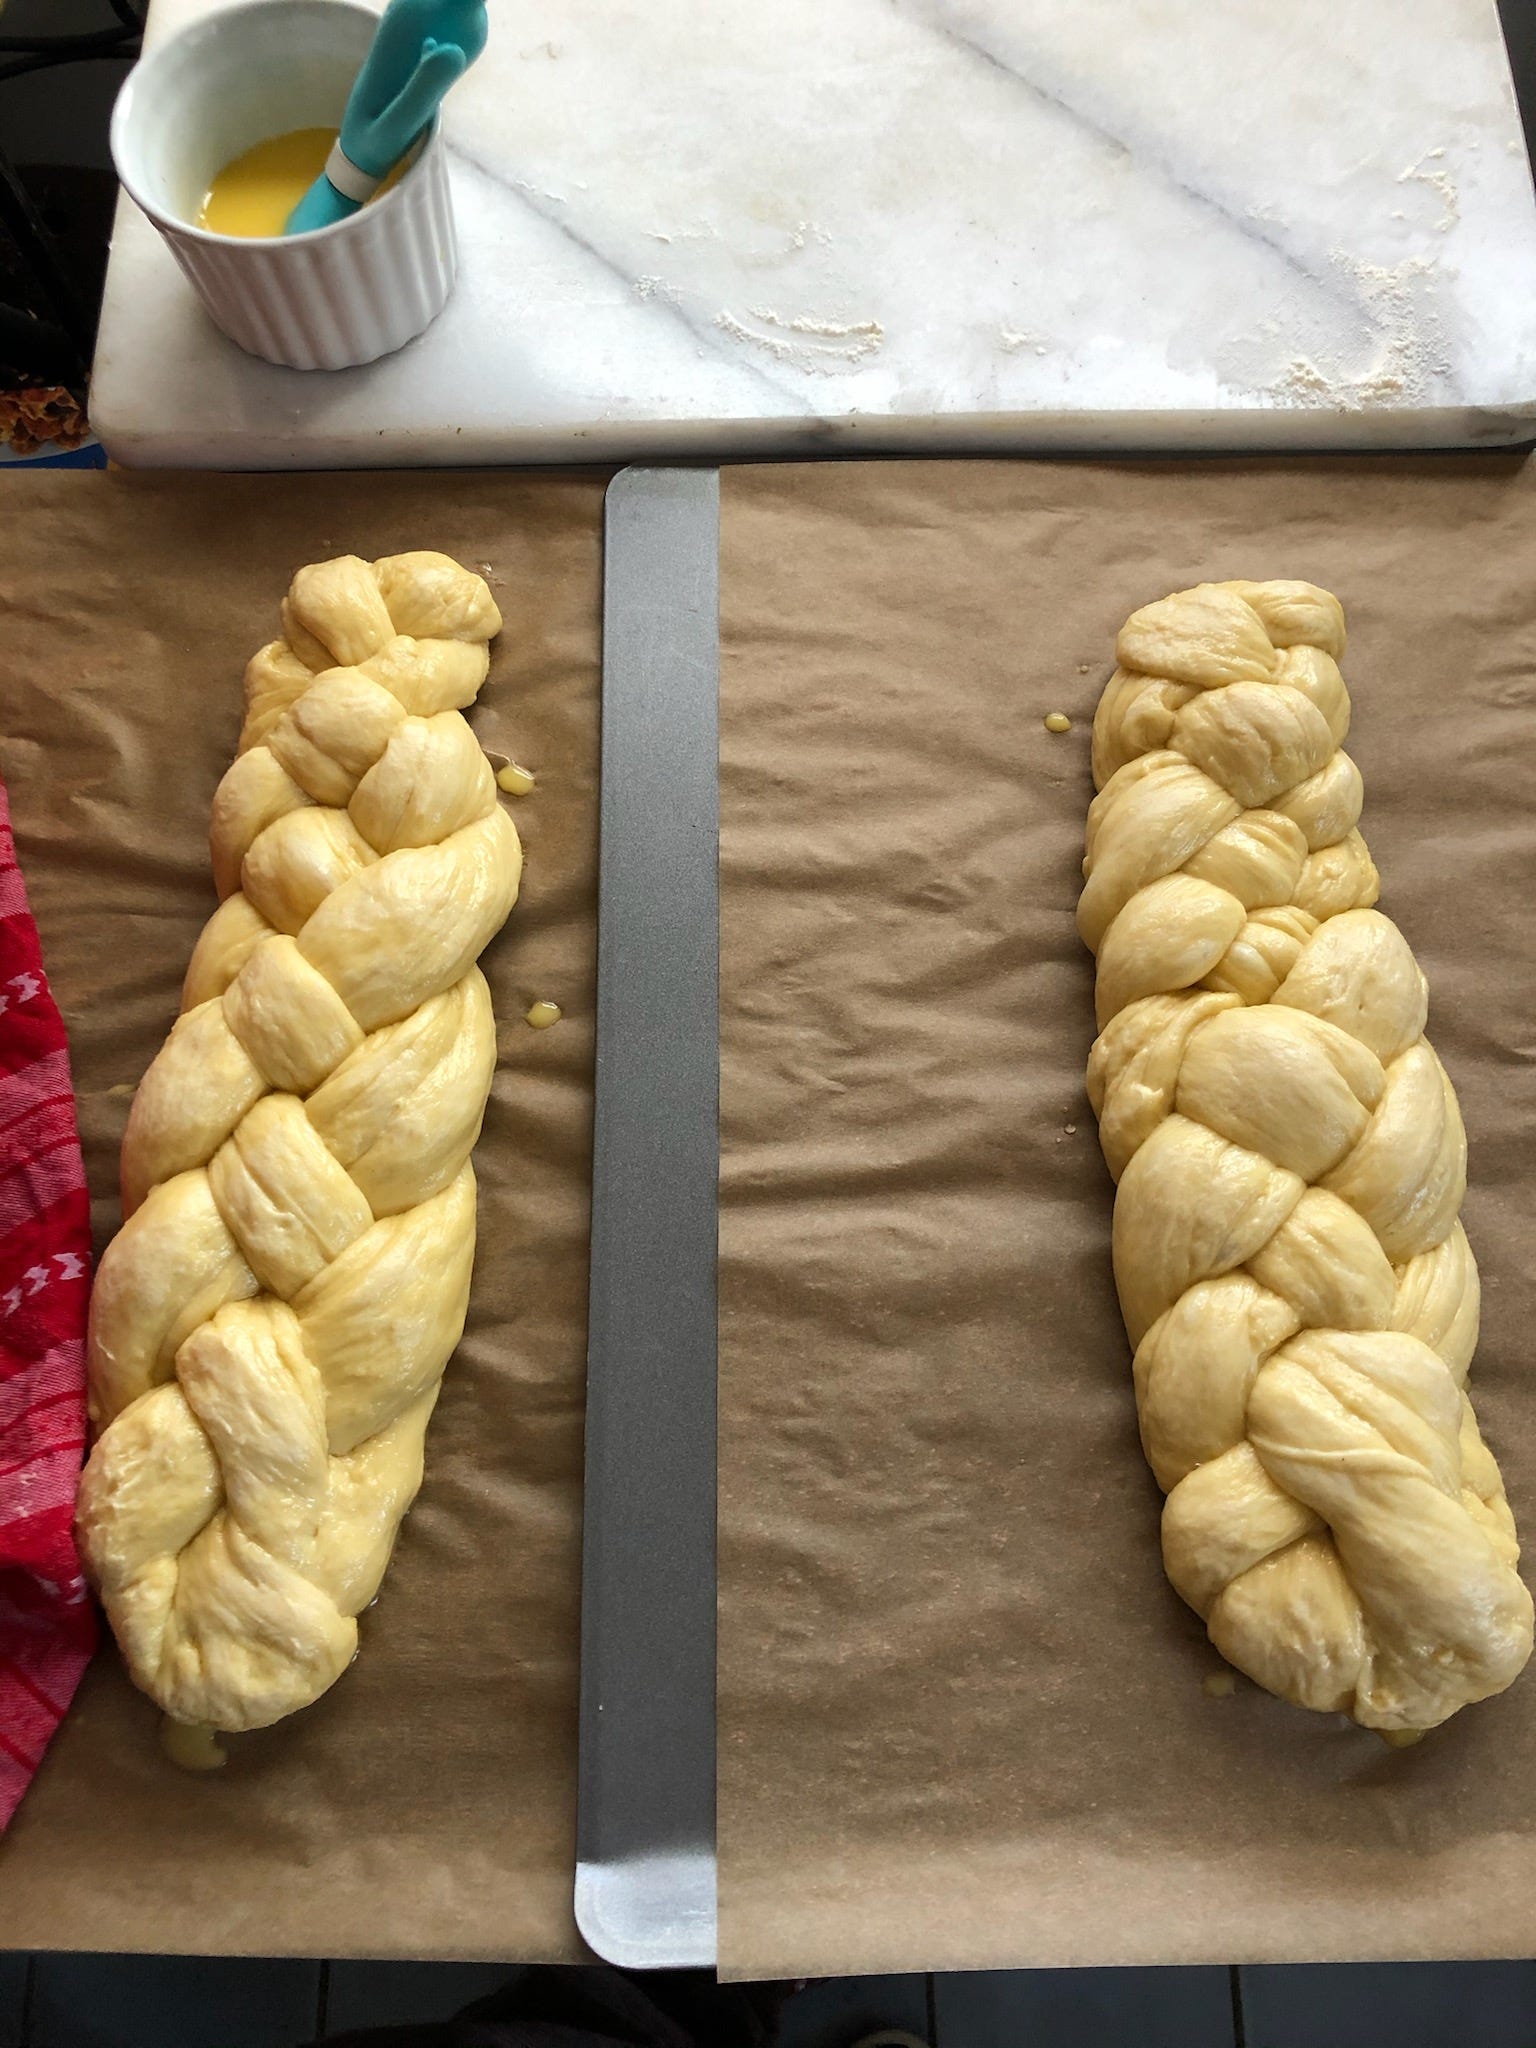
3. Lay out 4 strands lengthwise on work surface, putting the longest one(s) in the middle if the strands aren’t exactly even. Stack the top ends of the 4 strands. (Repeat for second loaf.)
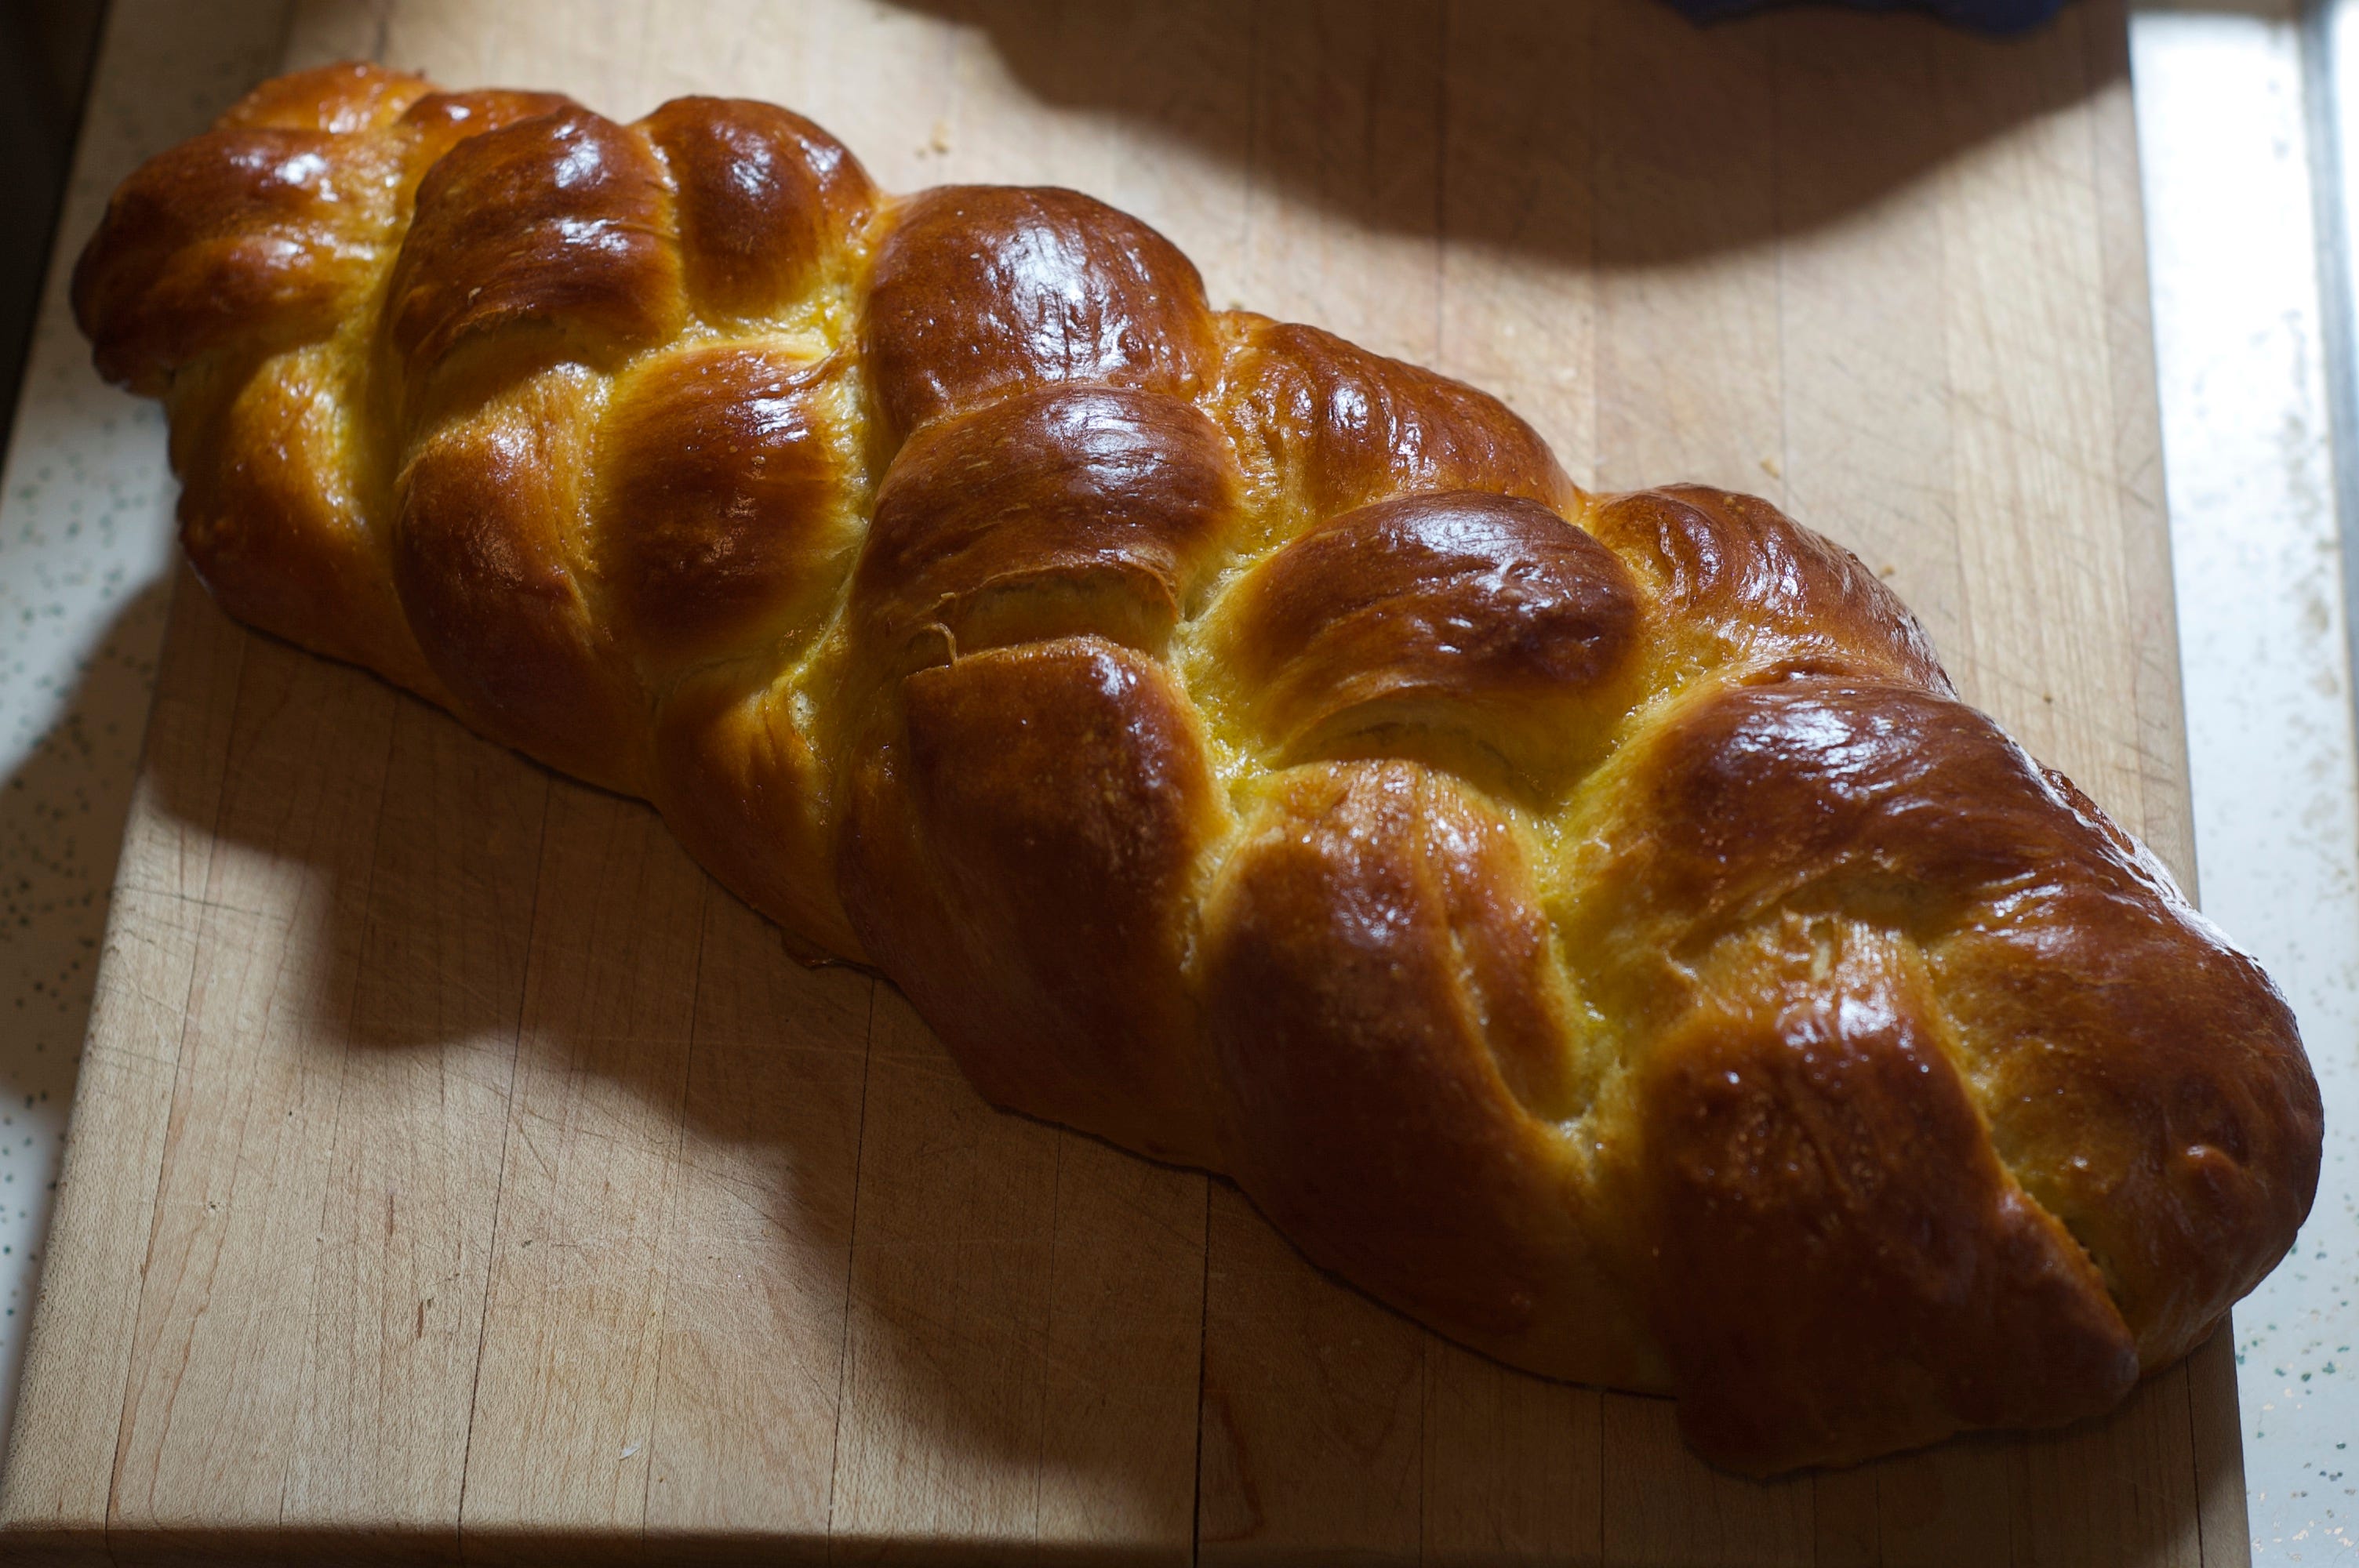
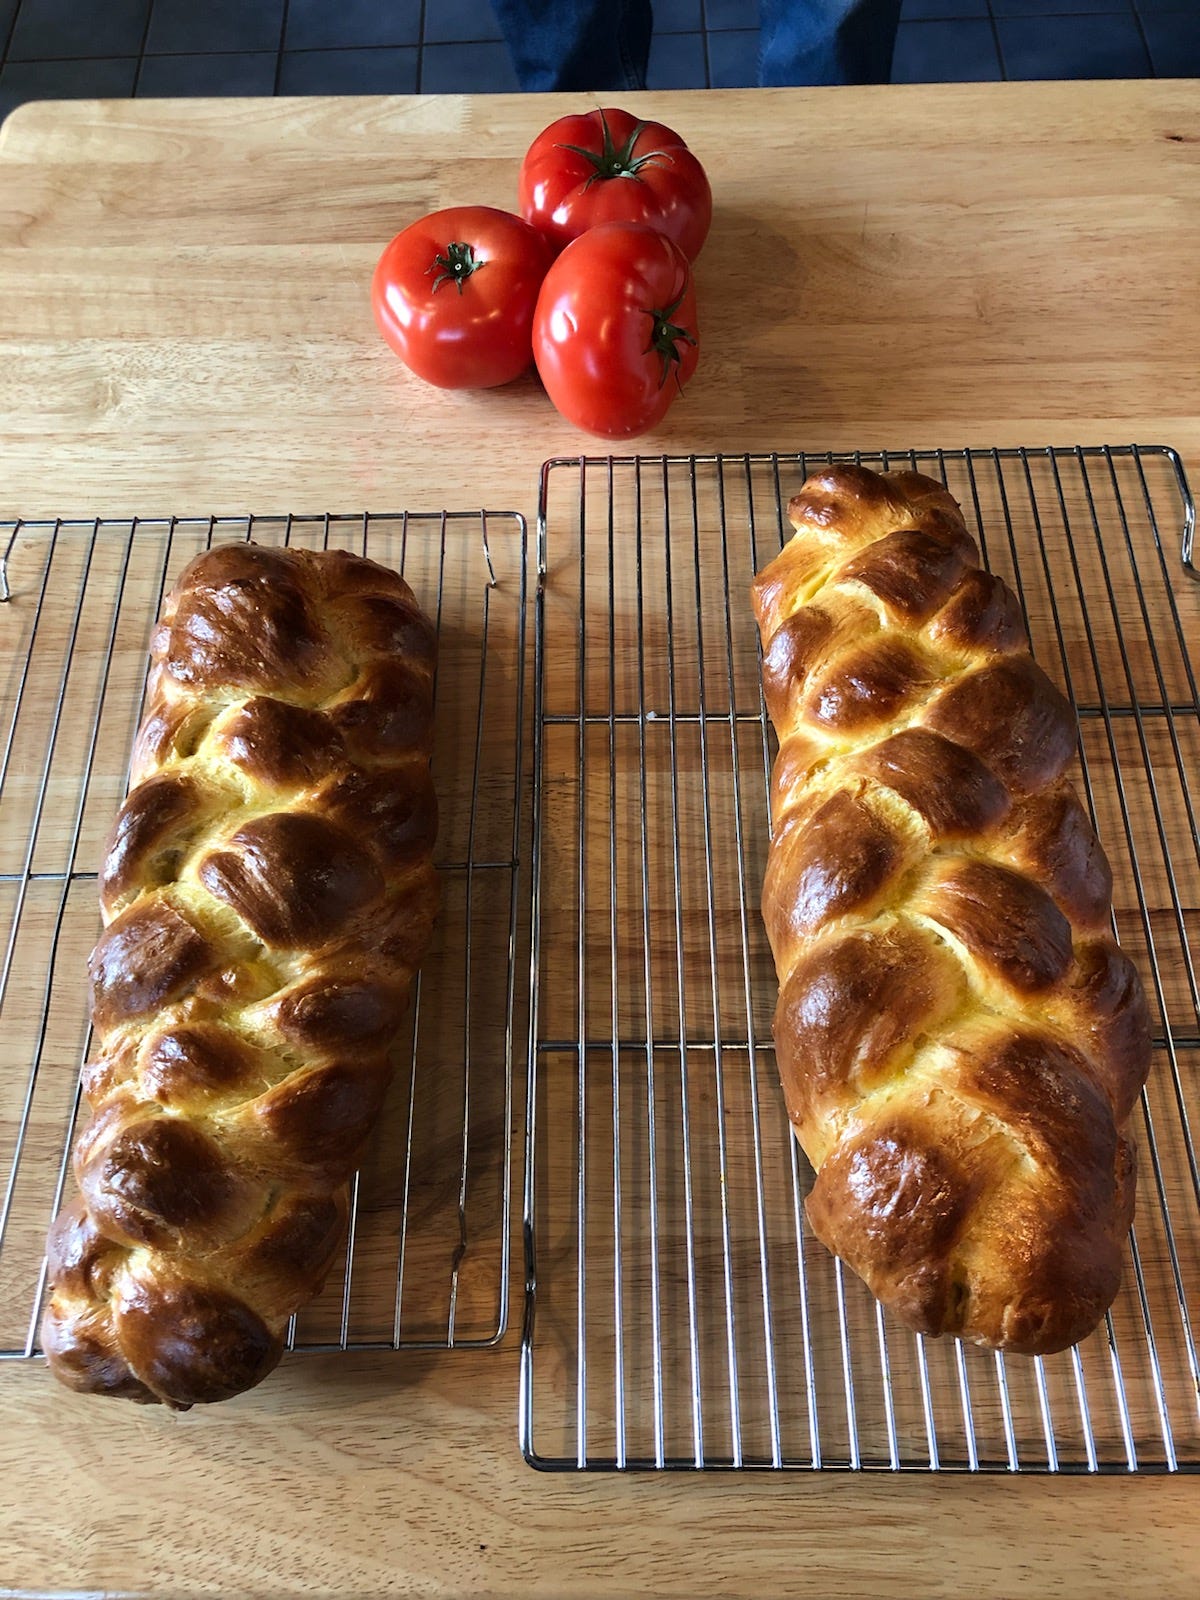
4. Braid the strands: start on the right, weaving each strand over, under, and over the other three. Repeat for the length of the loaf, always starting from the right. Don’t bunch the strands too tightly, and elongate the strands as possible while you’re braiding—and once you’ve completed the braid. Ideally, you want the bumps of the braid to be roughly the same size, but the loaf should still be chubbier in the middle, so loosen the braid a little in the middle of the loaf.—> As my mom wisely points out: it’s not about making perfect shapes; it’s about the love you put into it!
5. Repeat braiding for second loaf. When you’ve braided the full length of each loaf, close the ends by tucking them under. Make sure to do this at both the top and the bottom of each loaf—flipping the loaves around or walking around to the other side of your work surface in order to do so. —> Make sure the ends are secure or the loaves will unravel.
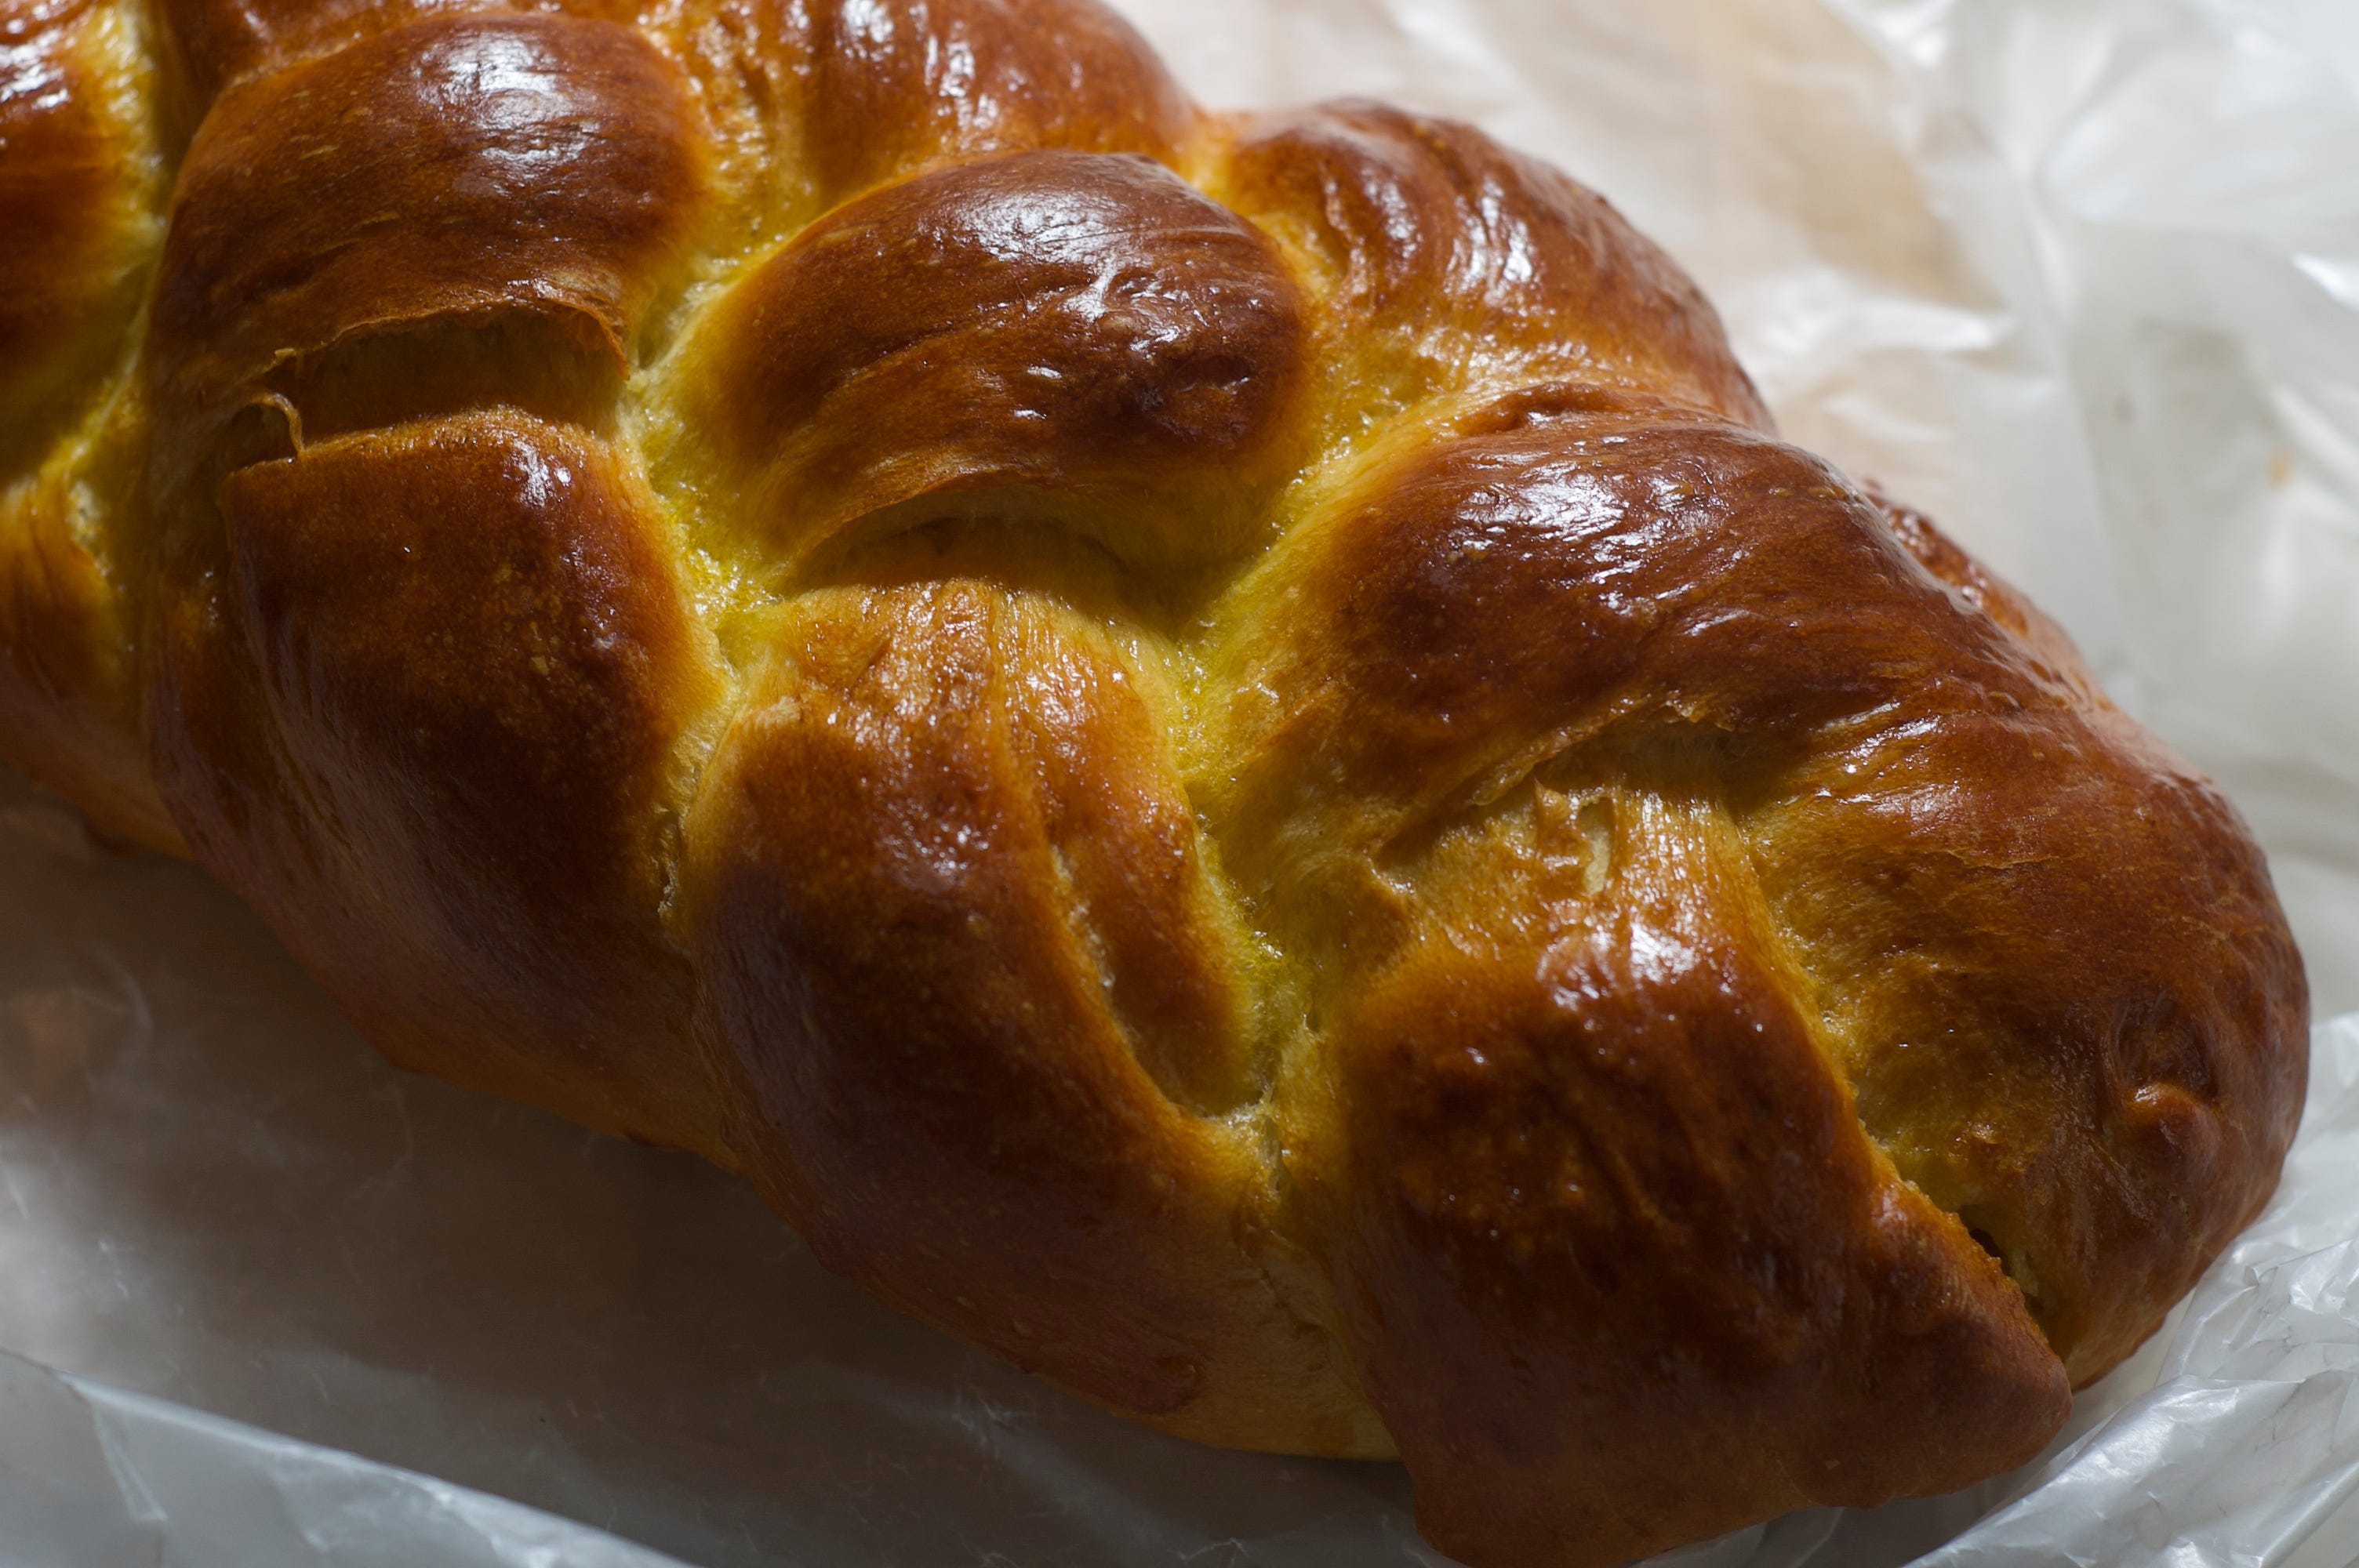
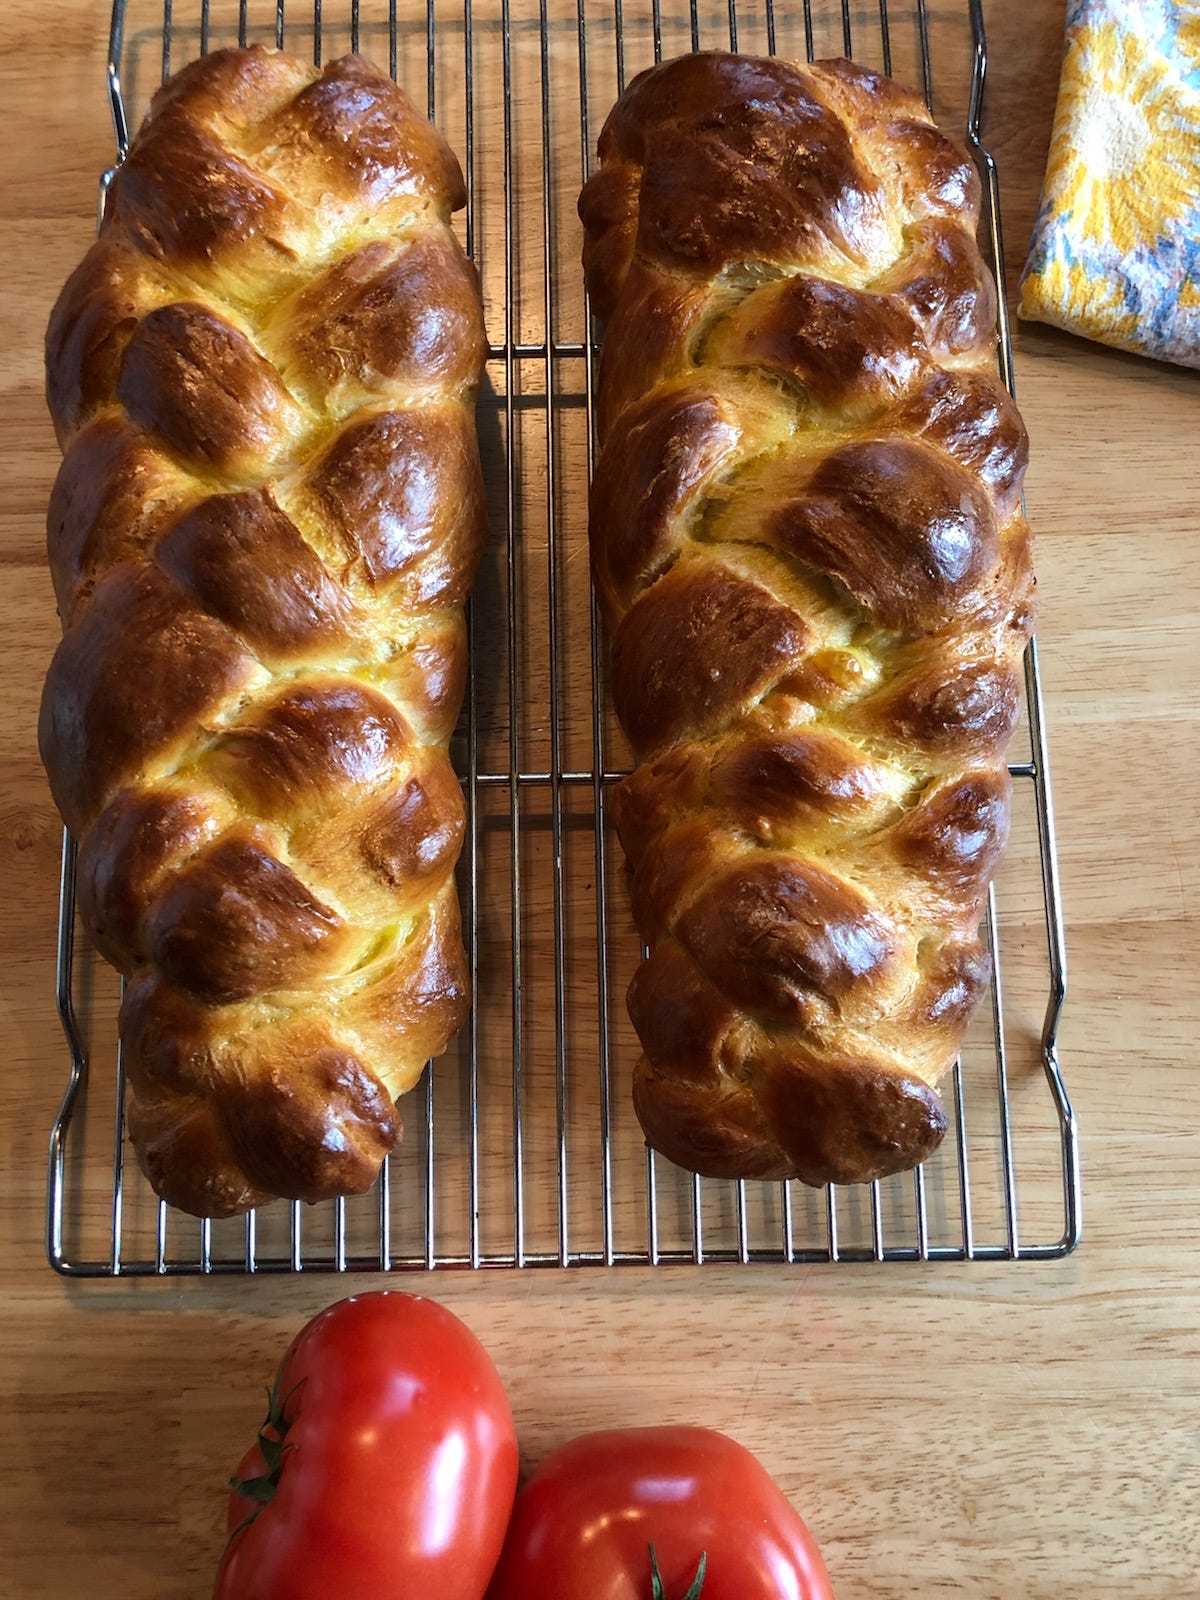
6. Transfer loaves to baking trays lined with parchment paper. Brush loaves generously with egg wash; make sure you get the sides of each loaf, and try to avoid soaking the bottoms of the loaves too much. A good coating of egg wash gives the bread its nice crust.
7. Re-cover the loaves on their trays with towel dampened again to prove a third time. (It is OK now for the towel to touch the loaves themselves a bit.)
—> Third rise = 35 minutes (leave loaves out to do this; meanwhile, preheat the oven to 350F)
To bake:
1. After third rise, brush loaves with egg wash again where towel touched them and then transfer trays with loaves to oven. Bake at 350F for 20 minutes.
2. At 20 minutes, remove trays from oven and brush loaves with egg wash again. Brush entire loaves, and especially target any lighter parts. —> Do this quickly; you don’t want the bread out of the oven for too long.
3. Flip and rotate trays when returning them to the oven—this is to get an even bake—and bake for another 20 minutes.
4. Test for done-ness: turn loaves over and knock on bottom; loaves should feel/sound hollow.
5. Enjoy!
Let me know if you try this or any other recipes shared on Sundays are for baking! Please like, comment and share this newsletter - and subscribe if you haven’t!